**How to Manage a Flooded Basement: 7 Key Steps and Insights**
Last week, I found myself in a stressful—and unexpected—scenario. On what started as an ordinary Monday afternoon, my wife reached out to let me know that water was infiltrating our basement. Panic set in instantly. How long had this water been gathering? What was my plan for cleanup? More importantly, how much would this disaster end up costing us?
Although the situation stirred up countless anxieties, I came to appreciate this as a chance to document my experience—not just for my own relief but for others who might encounter a similar predicament. After all, managing a flooded basement encompasses more than just addressing the immediate problem—it involves significant financial and emotional consequences. Below, I outline my comprehensive approach to dealing with a flooded basement, along with the insights I’ve gained and suggestions to reduce expenses and safeguard your home in the future.
—
### **The Cause: A Faulty Sump Pump**
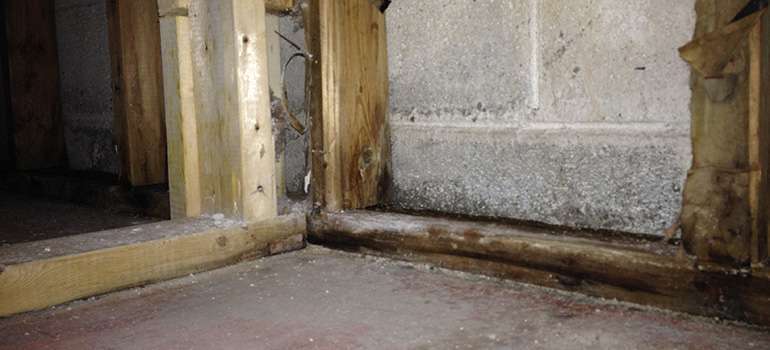
After rushing home, I discovered that our sump pump was ineffective. The float switch, designed to automatically activate the pump when water rises, had malfunctioned. This resulted in water accumulating and overflowing into the basement. Thankfully, we detected the issue in time to avoid severe damage (imagine inches of standing water), although the carpet was drenched, particularly the padding underneath. We managed to steer clear of major structural damage or safety concerns like electrical issues.
The important lesson? **Regularly inspect your sump pump to ensure it functions correctly.** Even minor malfunctions can lead to significant expenses and stress. This proactive step could have saved us considerable time, worry, and money.
—
### **7 Steps to Address a Flooded Basement**
Facing a flooded basement can feel daunting, but breaking it down into manageable steps made the process less overwhelming. Here’s the sequence I followed:
#### **Step 1 – Stay Calm**
Easier said than done, right? However, maintaining composure is essential for effectively addressing the situation. Start by assessing whether it’s safe to go into the basement. If water levels are elevated, be wary of potential electrical risks. If you can’t safely turn off the breaker, call a professional right away. Fortunately, my scenario didn’t include standing water or safety concerns, which allowed me to jump straight into clean-up mode.
#### **Step 2 – Determine the Source**
Before proceeding, stop the water’s origin, whether it’s a burst pipe, rainwater infiltration, or, as in my case, a malfunctioning sump pump. Identifying and addressing the underlying issue promptly prevents the situation from worsening. Once I got the sump pump operational again, water ceased to flow into the basement, allowing me to concentrate entirely on drying the area.
#### **Step 3 – Clear the Floor**
Immediately remove all items from the wet floor, particularly those that could absorb water or are fragile. I was lucky—most of our possessions were in waterproof containers or off the ground. Still, a few old photographs were damaged. If you have cherished or valuable items in a basement susceptible to flooding, consider storing them in airtight, waterproof boxes.
#### **Step 4 – Deploy Fans and Dehumidifiers**
Drying the basement thoroughly is crucial to prevent long-lasting damage and mold growth. I rented an industrial-strength dehumidifier and several fans from a local rental service for $145. Local rental services usually offer better deals than large chain stores, so be sure to shop around for rates. Over two nights, I rotated the machinery around the dampest areas every few hours. The effort paid off—by the third day, the basement was noticeably drier.
#### **Step 5 – Take Out the Carpet Pad**
While the carpet itself only absorbed limited water, the padding underneath was profoundly soaked—essentially acting like a sponge. I lifted the carpet, cut the pad into smaller sections, and discarded it outside. Using a plastic container to transport the soaked material minimized mess. A shop vacuum proved beneficial for sucking up any remaining pooled water.
#### **Step 6 – Verify Everything is Dry**
Don’t assume all moisture is gone—be thorough in your checks. Baseboards, drywall, trim, and other areas may still contain hidden dampness. I later utilized a moisture meter provided by our insurance adjuster to check that all spots were adequately dry. Mold can proliferate within 24-48 hours, so take this step seriously.
#### **Step 7 – Apply Anti-Mildew Treatment**
Once you’re assured that everything is dry, use an anti-mildew spray to reduce the risk of future mold. We applied a mildew prevention product recommended by American Home Shield and also acquired a smaller, personal dehumidifier to help keep air dry in the basement going forward.
—
### **The Financial Impact: Insurance to the Rescue**
Initially, the financial ramifications of the flooding appeared grim. Replacing the wet carpet would cost at